
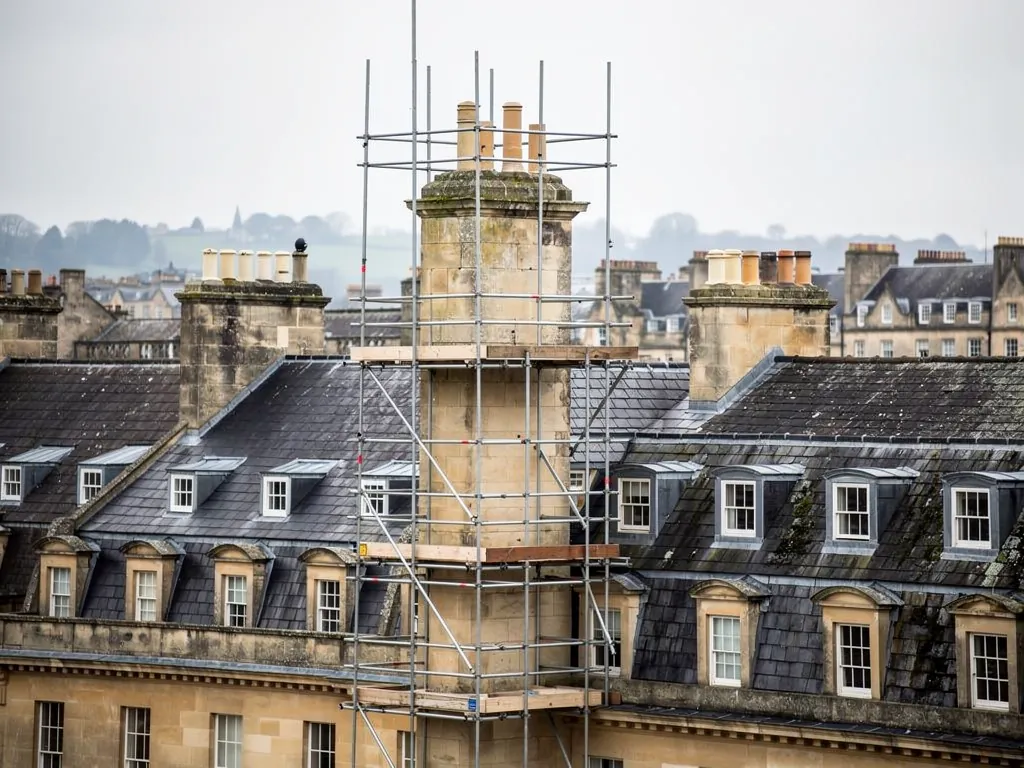
A roofer repointing a Bath stone chimney stack with lime mortar on scaffold

Chimney repairs in Bath

Bath stone and brick stacks are repaired from the pots down to the breast in the loft. Pointing is renewed in lime, flaunching is recapped, and the lead at the base of the stack is relaid so water keeps to the roof.

What we do

What our chimney work covers

A stack fails from the top and from the base. Once we have been up at roof height, the photographs show where yours has gone wrong and which of the jobs below will put it right.

Pointing, flaunching and potsLime repointing of stone and brick, a new sloped flaunching round the pots, and cracked pots or cowls replaced to match.
Lead flashings and soakersStepped flashings, soakers, the back gutter and the apron renewed in lead, tucked into the stonework and pointed.
Leaning stacks, rebuilds and removalStacks rebuilt in the original stone or brick where they have moved, with the consent route explained where a stack is to come down.

Signs to watch

Signs your chimney needs attention

  • Cracks or gaps in the flaunching round the pots
  • Crumbling mortar or flaking stone on the stack
  • A lead flashing lifted or hanging from the stack
  • A stack leaning against the line of the house
  • Brown stains or damp patches on the chimney breast
  1. 1

    Look at the whole stack

    We inspect it from the roof and the breast from the loft, and photograph the pots, joints and lead.

  2. 2

    Find where water enters

    We trace each stain back to its source, whether flaunching, pointing, lead or an open flue.

  3. 3

    Repair in matching materials

    Lime pointing, new flaunching and relaid lead are done to suit the stone or brick, with the roof covering made good.

  4. 4

    Leave it clear

    Waste is taken away, the slope round the stack is checked for anything knocked loose, and you get photographs of the finished pots, pointing and flashings.

Stack by stack

A chimney stack from the pots to the loft

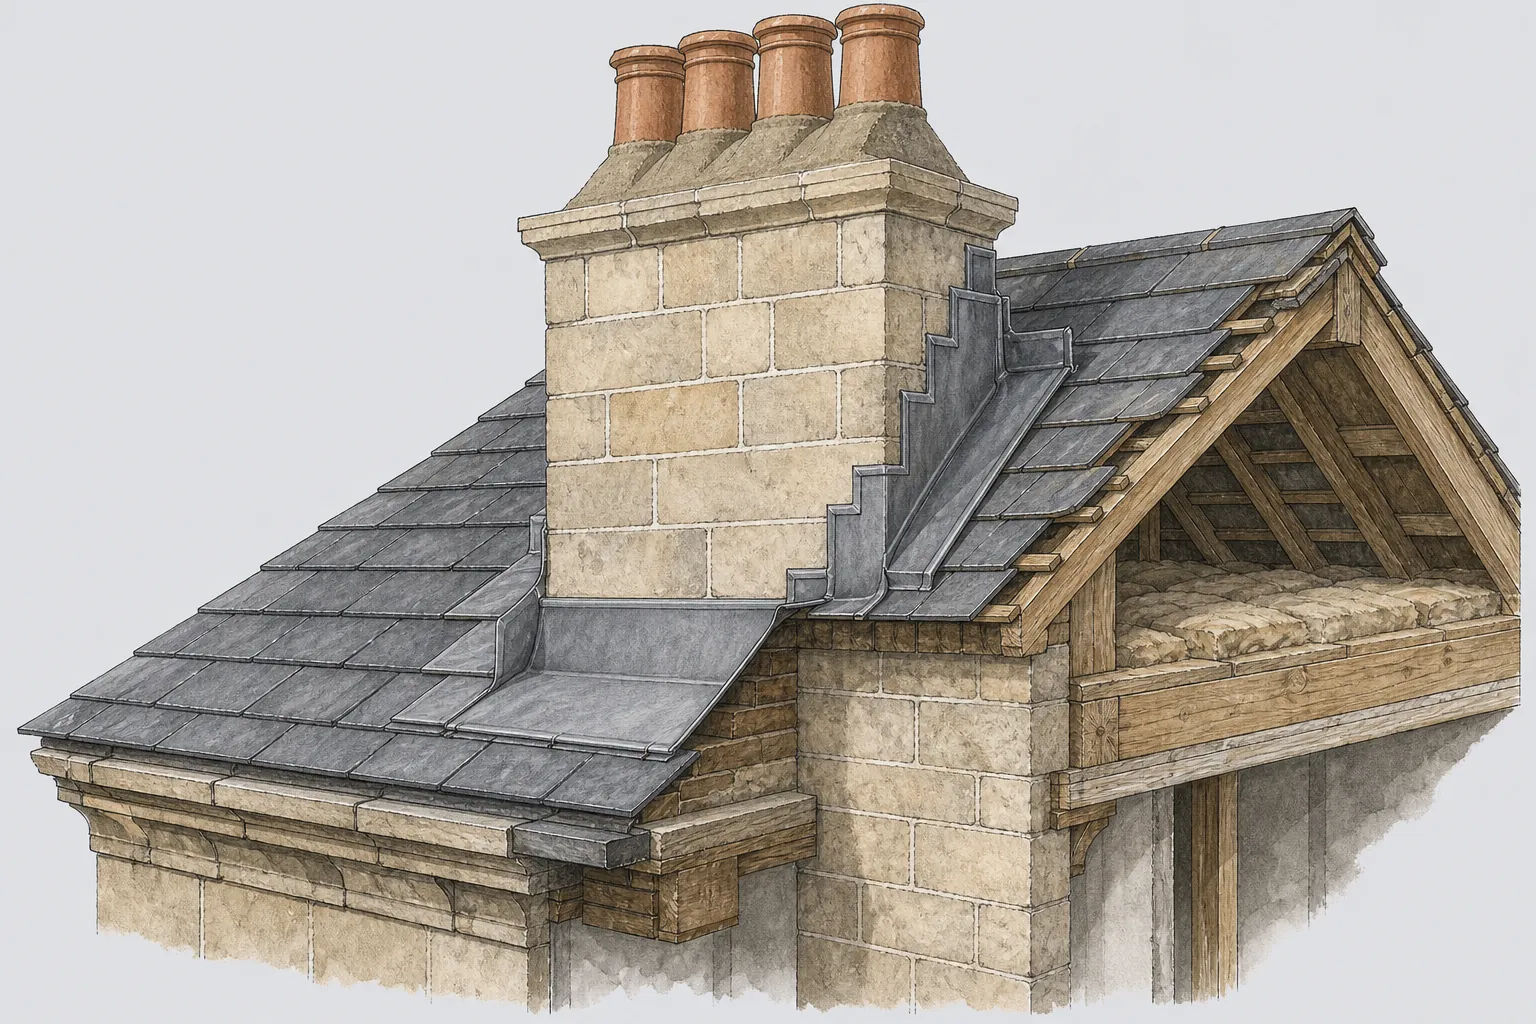
A stack is a tall, narrow structure on a roof, and it is wetted from every side. Six parts decide whether it stays dry, from the pots at the top to the breast in the loft.

  1. 1Pots and flaunching
  2. 2Stonework and pointing
  3. 3Stepped flashings
  4. 4The back gutter
  5. 5The apron
  6. 6The breast in the loft

Part 1 of 6

Pots and flaunching

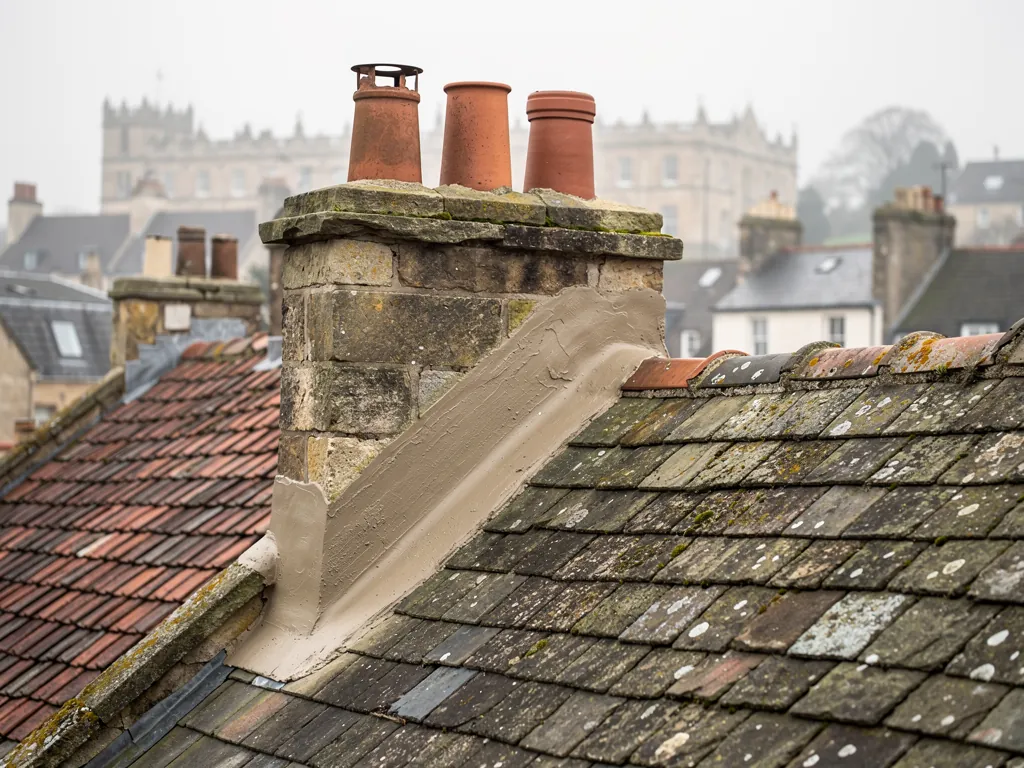
The top of a stack is a small mortar cap holding up the pots, and it has the hardest life of any part.

Lift your eyes to the very top of a chimney stack and you will usually see a row of clay pots standing in a sloping bed of mortar. The pots are the visible ends of the flues, the passages that carry smoke up from each fireplace. The mortar around them is the flaunching: a cap, built up in a slope from the pot to the edge of the stack, whose job is to shed rain outward instead of letting it sit on the stonework and run into the flues. It is a small piece of work, a few centimetres thick, and it takes the sky full in the face.

That exposure explains why flaunching fails first. It sits at the top of the highest structure on the house, and every frost, every gale and every heavy shower acts on it. Over time it cracks, shrinks away from the pot, and begins to crumble. Once the cap is open, water runs down the outside of the pot and into the top of the stack, and the stonework beneath begins to soak. You may never see the flaunching from the ground. Binoculars will show hairline cracks, dark gaps around the pot, or pieces of mortar that have dropped into the gutter or onto the garden path.

Pots, cowls and caps

Pots themselves are clay, sometimes terracotta and sometimes buff, in a range of heights and tops. A pot that has cracked or split, or one that leans, will let water into the flue and may fall. A cowl is a fitting on top of the pot; some are shaped to keep rain out, some to improve the draw, and some carry a mesh to keep birds from nesting. A flue that is not in use should be capped with a ventilated cover, not sealed, so air still moves through it and damp does not collect inside. Nesting birds are protected, so if a nest is in use we leave it alone until the young have flown.

Renewing the flaunching

Renewing it means breaking out the old cap, cleaning the top of the stack, resetting any pot that has moved, and building a new sloped bed around each pot. The mortar is chosen to suit the stack. On a Bath stone chimney, lime is the safer choice. On the proposed works at 7 Walcot Buildings, the Bath Preservation Trust asked for lime in the flaunching, and recorded its view that earlier use of cement may have worsened the stone damage to that stack. We give the new cap a proper slope, with a slight overhang so that water drips clear of the top of the stone.

Where several pots stand together, each is set in the same bed, and the surface is finished so that no pool of water can sit between them. We check the pot bases for hairline splits before we bed them, because a pot that is cracked at the base will let water in again whatever the mortar does.

Words you will hear

Flaunching
The sloping mortar cap that holds the pots and sheds rain off the top of the stack.
Flue
The passage inside a stack that carries smoke up from a fireplace.
Cowl
A fitting on top of a pot that keeps out rain or birds, or helps the draw.
Pot
The clay tube set into the top of the stack at the end of each flue.

The guide to what flaunching is and how it is renewed covers the work in order, and chimney pots and cowls sets out the choices at the top. If a pot alone is damaged, the answer on replacing a chimney pot on its own explains when that is enough.

Part 2 of 6

Stonework and pointing

Bath stone needs a soft lime mortar, and a hard cement one does the stone more harm than good.

Many Bath stacks are built in the same limestone as the walls below them. It is a soft, fine-grained stone that cuts cleanly, and a mason can work it into cornices and string courses. It is also a stone that weathers from the outside in. A chimney stack stands alone in the weather with no roof to shelter it, so the stone is wetted on every face, dried by wind, and frozen and thawed through winter.

Between the stones are the joints, filled with mortar. The mortar is not there to be stronger than the stone. It is there to be weaker. In a traditional wall, moisture leaves through the joints, and the mortar is meant to take the wear so the stone does not have to. When the joints are filled with a hard cement mortar, the rule reverses: water cannot leave through the joint, so it evaporates through the stone face, bringing salts with it, and the stone decays at the edge of each joint. The Bath Preservation Trust made this point at 7 Walcot Buildings, urging repointing in lime so the stonework could breathe and noting the harm that cement may have done to that stack.

Repointing in lime

Repointing means raking out loose or eroded mortar to a depth of a couple of centimetres, brushing the joint clean, wetting the stone so it does not drain the new mix, and pressing in fresh mortar in layers. Lime mortar sets slowly and needs protection from frost and from drying too fast, so the work is timed for mild, damp weather and covered when the forecast turns. The joint is finished flush or slightly recessed, never proud, with a texture that matches the stone around it. MyBuilder's 2026 cost guide gives chimney repointing an average of about £750 within a range of £500 to £2,000. These are national figures, and the number on your written quote comes only after we have inspected.

Brick stacks and spalling

Not every stack near Bath is stone. Brick stacks are common on later houses, and the same logic applies. Bricks that have spalled, with their faces flaking off in frost, are cut out and replaced with matching bricks. Where the pointing is the problem, it is raked out and renewed. A brick stack that has been rendered or painted can hide cracks and trapped damp, so we look behind coatings that have blown or blistered.

Leaning stacks, rebuilding and removal

A stack that leans needs care. It may have been built out of true, or it may have moved because the mortar has gone, or because water has weakened the masonry in the core. Where the stack is sound but loose, it can be taken down to the roof line and rebuilt using the same stone. Where it is unsafe, it may have to come down altogether. Taking a stack down or shortening it is a structural change, so ask your building control body what applies. For a listed house, or a house in a conservation area, B&NES planning should hear about it before anything comes off the roof.

Myth

A stronger cement mortar makes a stone chimney last longer.

Fact

Cement is harder than Bath stone, so water and salts leave through the stone instead of the joint, and the stone is what decays.

For the method in full, see lime mortar repointing on Bath stone chimney stacks, and for the reasoning, why cement is bad for Bath stone chimneys. Brick stacks have their own page on brick chimney repairs, and leaning chimney stacks covers causes and fixes.

Part 3 of 6

Stepped flashings

Lead stepped into the stonework is what seals the stack to a sloping roof.

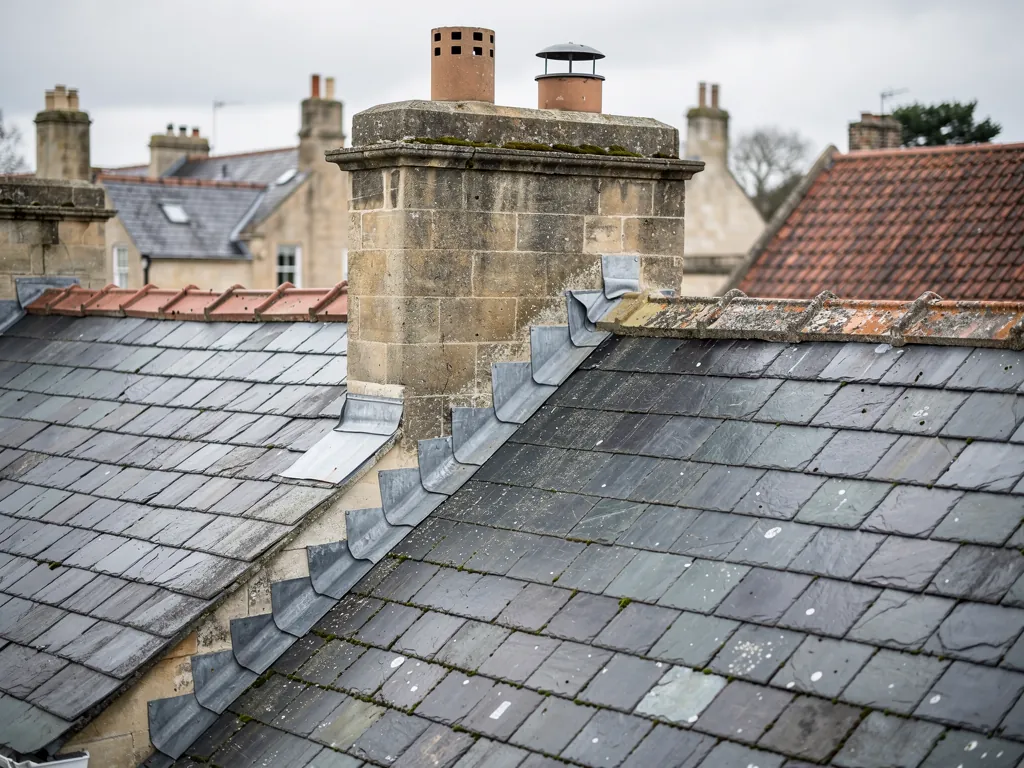
A stack that rises through a pitched roof leaves a joint around its base, and rain sliding down the slope is always trying to find it. The seal is a flashing: a strip of sheet metal, usually lead, that overlaps the roof covering at the bottom and is tucked into the masonry at the top. On the sides of the stack, where the roof slopes and the stack does not, the flashing is stepped. It rises in a series of small steps that follow the sloping line of the roof, one step for each course of stone or brick, each tucked into the joint above.

The flashing is made up of two layers that work together. Below it, a soaker is a small rectangle of lead, bent to an L shape, that is interleaved with the tiles or slates along the side of the stack, so water coming down the slope is carried over the lead. Above it, the step flashing, sometimes called the cover flashing, hangs over the soakers like a shield, with its top edge pushed into a groove cut along a mortar joint in the stack. The upper edge is held with lead wedges and pointed over, in lime mortar on older stonework.

Why they fail

Lead is soft, and a flashing that is fixed too firmly can crack when the metal expands in the sun and shrinks in the cold. Poor pointing is the commoner cause. Once the mortar gripping the top edge has washed out, the lead loosens and water slips in behind it. A flashing that was never wedged properly will lift in wind. Cement fillets, a mortar band run along the base of the stack to hide the join, crack and let water in; they are a poor substitute for the lead, even though they are common on older repairs.

Signs you can see from the ground include a flashing hanging away from the stack, a dark stain on the wall just below the roof line, or a line of mortar fillet breaking off. Inside, the signs are damp patches on the chimney breast or the ceiling close to it.

What a proper repair involves

We start by checking how much of the flashing is sound. Where only the pointing has failed, we rake out the joint, re-wedge the lead and repoint. Where the lead is cracked or has lifted, we renew it in new sheet, cut to length so each piece can move, with the soakers renewed to match. The new lead is dressed tight to the stone and the roof covering and fixed with lead clips, not nails through the face. For a flashing repair, the same MyBuilder guide gives £250 to £1,200 depending on extent and access.

Lead comes in graded thicknesses, known as codes, and the choice for each detail is made on site.

Parts of the lead at a chimney stack

PartWhere it sitsHow it fails
Step flashingUp the sides of the stack, stepped with the roof slopeLoose wedging, washed-out pointing, cracked lead
SoakersInterleaved with the roof covering beside the stackSlipped or split pieces, worn edges
Back gutterBehind the stack on the uphill sideBlocked, pooling water, split joints
ApronAcross the lower face of the stackLifted top edge, gaps in the mortar line

The guide to chimney flashings, soakers and back gutters describes each piece, while the answer on how long chimney flashing lasts covers wear. Our lead roofing page explains how lengths and joints are laid out for lead generally, and it applies equally here.

Part 4 of 6

The back gutter

Behind every stack on a slope, a small lead channel carries the water round it.

A stack that rises through the middle of a slope stands in the way of the water coming down. Rain running down the roof meets the back of the stack, the face on the uphill side, and has nowhere to go but round it. The back gutter is the lead-lined channel that deals with this. It sits behind the stack, tilted slightly so that water runs to either side, then passes down beside the stack along the soakers and flashings to the roof below.

The back gutter is one of the hidden parts of a roof, and the one most often overlooked. From the ground it cannot be seen. From the roof, it sits in a tight gap between the stack and the slope, and fills with leaves, moss and grit. A blocked channel holds water against the back of the stack and lets it find a way through the lead. Because the lead sits on a timber board, called a gutter board, a leak at this point rots the timber below, and the damp often reaches the ceiling or the chimney breast before anyone sees anything wrong outside.

Reading the signs

If you see a stain on a first-floor ceiling beside the chimney breast after heavy rain, the back gutter is among the first places we check. So is any damp patch on the breast itself, above the roof line, in the loft. A back gutter that is working shows a clean channel with a visible fall, a slight upstand at the stack, and soakers in good order at each side. A failed one shows a ponded channel, split lead at the corners or a patch of soft, dark timber under it.

How it is built and repaired

The channel is formed from a single sheet of lead dressed up the back of the stack and over a timber upstand at the roof side, with the top edge tucked into a joint in the masonry. At the corners the lead is folded, not cut, and joined by a welt or a lap. The channel falls to each side so that nothing can pool. Repair starts with clearing the debris and looking at the lead and the board together. A small split can be patched, but where the lead has cracked across the width, or the board has gone soft, the channel is stripped and relaid on a new board, with the flashings above it renewed at the same time.

Because the back gutter shares its upper edge with the step flashings and the apron, the three are usually repaired together. Treating one in isolation tends to leave the water finding the next weakest point in the lead.

On a survey we photograph the channel before we touch it, so you can see what we found.

If a stain is already showing, the answer on why a chimney is leaking lists where water most often gets in, and the longer page on flashings, soakers and back gutters explains how the three are joined. Nearby valleys, parapets and box gutters also belong to our lead roofing work.

Part 5 of 6

The apron

The apron is the lead across the front of the stack, and it takes the water that the back gutter sends round.

The apron is the piece of lead that runs across the lower face of the stack, the side facing down the slope. Water that has been channelled round the stack by the back gutter and the side flashings arrives here, along with whatever runs down the face of the stack itself. The apron carries it over the roof covering below. Its upper edge is turned into a joint in the masonry, wedged and pointed. Its lower edge overlaps the tiles or slates in a smooth sweep, often with a welt, a small fold, along the bottom edge to stiffen it and hold it down.

Of all the lead at a stack, the apron is the easiest to see from below, and it is the first thing a homeowner notices. A lifted lower edge, a bulge or a dark stain below it tells you that water has been getting behind. The most common faults are lead that has slid downhill, where it was fixed too firmly and stretched with each warm spell, and pointing that has failed along the top edge. A smooth sweep of lead will hold water on the roof, but a sagging or puckered one will not.

Fixing and finishing

New lead is cut so that it can move. On a long apron, a single piece is rarely right; it is made up in lengths, lapped at the joints, and each length is fixed at the top only, with the lower edge held by clips so it can slide as the metal warms and cools. The upper edge goes into a raked joint, is secured with lead wedges at a set spacing, and is pointed over. On stone, the pointing is lime. On a tiled roof, the lead is dressed over the tile profile; on a slate roof, it sits flat and tight on the slates.

Where the roof beneath is slate or tile, the covering at the apron is lifted and relaid at the same time, so the lead goes onto sound battens. A rotten batten under the lead will let it sag however well it is dressed.

Mortar fillets and sealants

Older repairs often replace the apron with a fillet of cement mortar and a bead of sealant. It looks neat for a season or two. Mortar then cracks away from the tile and the stone, because both move at different rates, and sealant dries out in the sun. We would put lead back wherever the stack and the roof allow, because it can move without breaking and it lasts well when it is detailed properly.

A repair of this sort needs reaching the stack safely, so scaffold or a ladder-free access is part of the price. The same guide reports a simple patch at about £250 without scaffold and £550 to £650 with it. Treat that as a national yardstick only.

Lead or mortar fillet

Renew a failed apron in lead, because a mortar fillet cracks as the roof and stack move at different rates.

Our guide to chimney repair costs shows how scaffold, stack height and stone or brick change the price, and the answer on whether chimney repairs need scaffolding explains when access can be simpler. Fillets and sealants are covered by chimney waterproofing sprays and whether they work.

Part 6 of 6

The breast in the loft

Damp at a chimney breast often starts on the roof, and the loft is where you can follow it down.

The chimney breast is the part of the stack inside the house, the projecting block of masonry that rises from the fireplace through each floor and into the loft. Where it passes through the roof space, it is bare brick or stone, and you can look at it directly. That makes the loft the best place to find out whether a stain downstairs is coming from the roof or from somewhere else.

Start with the stack where it meets the roof timbers. Look for tide marks, pale salt crystals on the surface, and damp patches on the face of the masonry. Check the roof timbers beside the breast for dark staining, and look along the roof's inner face for daylight or wet spots near the flashings. Water that gets in at the flaunching, the stonework joints or the lead tends to run down inside the stack, and it follows the masonry rather than the roof, so the stain may appear several feet below the point where it entered.

Causes of damp on a breast

There are several causes, and they can overlap. Rain through failed flaunching or pointing is the most common. A flue that is open at the top and unused collects rain and condensation, and a capped flue with no ventilation traps moisture. Old flues that served a solid fuel fire may carry soot and tar that stain wallpaper and plaster brown as damp passes through them. The salts left by combustion draw moisture from the air and turn a dry wall damp in wet weather. Lead failures at the stack let water into the roof timbers and the top of the breast.

That is why we look at all of it before suggesting a fix. Re-plastering a damp breast without finding the source gives you a new stain in a year. If the cause is on the roof, the repair is up there: new flaunching, repointing, renewed flashings, a ventilated cap on a disused flue. If it is inside the flue or the masonry, the damp is allowed to dry before the surface is redecorated.

Removal and consent notes

Some owners want to take out the breast, the stack or both, to make room. A chimney breast carries load from the stack above it, so removing it is structural work and calls for support to be designed and installed first. Ask your building control body what applies. On a listed house the stack can be part of what is protected, which means a call to B&NES comes before any planning of the work. In a conservation area, the council can tell you whether permission is needed. We give you a written description of the work to take to them.

We do not take any stack down or remove a breast until the consent route is clear and the structure above has been assessed. The roof side of the job, making good the slope where a stack has been removed, is where we can help.

Myth

Brown marks on a chimney breast mean the roof is leaking.

Fact

The staining is often tar or combustion salts from an old flue being drawn out by damp, so the roof, the flue and the walls all need checking before anyone decides.

For more on the symptoms, see damp chimney breasts and tracing the cause and the brown stains on a chimney breast. If removal is on your mind, chimney stack removal: consent, structure and cost and capping a disused chimney set out the choices.

Typical costs

What chimney repairs typically cost

Below are typical UK ranges from the 2026 MyBuilder chimney guide. Scaffold, stack height, stone against brick and the amount of lime work push a job up or down.

JobTypical UK range
Chimney repair (general)£500 to £2,000
Repointing a stack (average about £750)£500 to £2,000
Flashing repair£250 to £1,200
Stack rebuild£2,000 to £10,000+

National guide figures, not our prices. Scaffold is a large part of small jobs: a simple patch is about £250 without it and £550 to £650 with it. Our own figure arrives in writing after the visit.

Guides and answers

Chimney repair guides

Quick answers

Questions

Chimney stacks on Bath roofs

Why does lime mortar suit a Bath stone chimney better than cement?

Lime is the softer partner, so damp leaves by way of the joints and the mortar takes the wear. Cement is harder than the stone, which forces the damp and salts out through the stone face and decays it. The Bath Preservation Trust has asked for lime on a listed Bath stack.

Can a lean in a chimney stack be fixed without taking it down?

Sometimes, if the stack is sound and the lean comes from failed mortar or a slipped bed. We check the movement, the joints and the masonry in the core first. Where the masonry is loose, the stack is taken down to the roof line and rebuilt in the same stone or brick.

Does a disused chimney flue need to be capped?

A flue that is not used should be capped to keep the rain out, but the cap should let air through so the inside of the flue stays dry. A sealed flue can trap moisture that then shows on the breast. We fit a ventilated cap and check the pot first.

How do I tell if the damp on my chimney breast comes from the roof?

Follow it up. Look at the breast in the loft for tide marks and salt, check the flashings and back gutter for staining, and look at the pointing. Brown stains often come from old flue tar rather than a roof leak, so check both before redecorating.

Do I need consent to take down a chimney stack in a conservation area?

Put the question to B&NES planning before the stack comes down, since the answer turns on the house and its status. A listed building needs listed building consent, which is a separate matter from planning permission. The structure is a separate question, for your building control body.

Can chimney flashings be repaired in lead without renewing the lot?

Often, yes. If only the pointing has failed, we re-wedge the lead and repoint. If a section has cracked or crept, we renew that run and its soakers. A full renewal makes sense only where the lead has failed across several sides, and we show you the photographs.

Book a chimney survey

Take a photograph of the stack from the garden, or of the stain on the breast, and pass it to us through WhatsApp, the short form or 01225 285181. We will visit to check the pots, the pointing, the lead and the breast, and put the repair that the stack needs into a fixed price: pointing, flaunching, flashings, or a rebuild.

Get a free survey

Get your free survey

Get your free roof survey

Tell us what's happening and we'll call you back to arrange a visit. Prefer to talk? Call 01225 285181.

  • Photos of your own roof
  • A fixed price in writing
  • 10-year workmanship guarantee
Call Free survey