
A roof that starts to leak in a storm feels like an emergency, and the instinct is to rush at the problem. The better instinct is to slow down for the first few minutes and deal with whatever could hurt someone. Water and mains electricity share a house badly, and a wet ceiling can come down without much warning. Once the household is safe, the job becomes one of limiting the damage, recording it and getting someone qualified onto the roof. This guide follows that order. It covers the electrics, the water, the photographs your insurer will ask for, the point at which to ring a roofer, and what a make-safe visit involves when it arrives. Nothing here needs you to climb onto the roof, and none of it needs a tool beyond what is in the kitchen cupboard. It does not promise any arrival time, because no honest roofer can while a storm is still passing.
Start with people and electrics
Before you look for the leak, look at where the water is going. If it is running through a ceiling light, a loft hatch with a pendant nearby or a wall with sockets on it, treat that circuit as live and wet. Switch off the lights, or the whole circuit, at the consumer unit (the fuse box) if you can reach it without standing in water. Do not touch a dripping light fitting, and do not flick the switch to see whether it still works. Have an electrician check any fitting that has been wet before you use it again. Our page on water coming through a light fitting goes into this in more detail.
Next, look up at the ceiling. A section that sags, bulges or has turned a dark, glossy brown is carrying a weight of water that it was never made to hold, and plaster is heavy. Move people and pets out of the room below it and keep the door shut. If the ceiling looks as if it may fall, or there is any sign that part of the roof or chimney has moved, step outside and call 999 if anyone is at risk.
Resist going up to look. Wet slates and tiles are slippery, wind is gusting around a roof edge, and a fall from even a low roof does serious harm. A ladder footed on wet ground in a storm is no safer. You can learn most of what you need to know from the loft hatch and the garden, and what you cannot see from there is a job for someone with the right equipment and a harness.
Finally, check for anything else that water might reach: an extension lead on the floor, a television, a phone on charge, boxes of paper in a cupboard. Unplug what you can, and move it to a dry room. Doing this in the first few minutes protects more than any later repair will.
Contain the water and protect the room
With the electrics dealt with, aim to give the water somewhere sensible to go. Put a bucket, washing-up bowl or large plastic tub under each drip. A towel laid in the bottom or a piece of cloth draped over the rim stops the splash. Slide furniture to the middle of the room, away from the stain, and lift rugs. If a bed or sofa cannot be moved, cover it with a plastic sheet or a bin bag. Take pictures off the wall beneath the damp patch and lift curtains out of the way.
A ceiling sagging under a pocket of water can be relieved, and this is the one case where making a hole helps. Stand a bucket underneath. Then, from the side and not directly below, push a screwdriver or the point of a knife through the lowest part of the bulge so that the water drains in a controlled stream instead of the whole panel dropping. The ceiling will need replastering afterwards, but a small hole costs far less than a large collapse. Wear eye protection if you have it, and stop if the plaster feels as if it is failing around the hole.
In the loft, if you can reach the hatch safely, a quick look can help. Water often runs along rafters and the top of the insulation before it drops, so the dripping point and the real entry point can sit some distance apart. Put a bowl on the boards or joists where you see the water landing, and note where daylight shows through the roof, but do not step between the joists. The ceiling below is only plasterboard and will not take your weight.
Mop up standing water with towels, and use a wet vacuum if you own one. Open a window in the affected room once the rain eases, and keep the heating gentle, not hot. Fast, heavy drying can crack plaster and timber that has taken on water. The aim for now is to stop the damage spreading, and the drying out comes later.
Photographs, notes and the insurer
Take photographs before you start moving things and again once the room is as dry as you can make it. Wide shots of each affected room show scale. Close-ups of the stain, the drip and any damage to furniture or floors show detail. If a section of ceiling has come down, photograph it where it lies before sweeping up. From the garden, photograph the roof itself: missing tiles, lifted slates, a displaced chimney pot, debris lying on the roof or in the gutters below. Zoom in on anything that looks wrong, but keep your feet on the ground while you do it.
Write a short note of the date, the time you first noticed the water and the weather at the time. If a neighbour saw the same storm, a message from them agreeing the conditions can be useful later. Keep any receipts for emergency costs, such as the hire of a dehumidifier or a night spent elsewhere. A roofer's written report, with their own photographs, adds weight to a claim, and we can supply photographs of your roof after our visit for that purpose.
Ring your insurer or broker as soon as it is practical. A storm claim usually turns on one question, which is whether the weather or slow deterioration let the water in, so the cause matters as much as the damage. Policies differ on what counts as a storm and on wear and tear, and a claim can go either way. Photographs, a note of the conditions and a roofer's report are the evidence that carries most weight. We can show you clearly what we found on your roof and why, which is the part we control. Our page on roof leak insurance covers the process in more detail.
What not to try from the ground or a ladder
Hardware shops sell tubes of sealant, rolls of flashing tape and tins of bitumen paint, and they are tempting on a wet afternoon. They rarely help. Sealant will not stick to a damp surface, and when it does stick it often seals the visible gap while the water takes another route underneath. Bitumen painted over a flashing stiffens and cracks within a season. Tape that was applied in the rain peels the first time the sun hits it. A temporary fix made in the wrong place can also make the proper repair harder, because the roofer then has to remove it before finding the original fault.
Throwing a sheet of polythene over the roof is worse. It catches the wind like a sail, drags the neighbouring tiles with it and can do more harm than the original leak. A tarpaulin laid correctly is secured under the ridge and battened down at the edges, and that is skilled and risky work to do at height.
Do not walk on the roof to look for the problem. A tile that is sound from the ground can crack underfoot, and a person on a wet slope is at risk from the moment they leave the ladder. If the weather is calm and the roof is single-storey, a look through binoculars from the lawn shows more than you would expect. Lift a pair of eyes to the chimney, the valleys and the line of the ridge, and look for the obvious: a gap, a dark patch, a tile that sits proud of its neighbours.
Gutters deserve one note. An overflowing gutter during a downpour can push water behind the fascia and under the first row of tiles. If you can reach a blocked downpipe at ground level, clear it with a gloved hand. Leave anything above first-floor height to someone with a safe means of access.
When to call a roofer, and what to say
Call as soon as the household is safe and the water is contained. If the leak is steady, if a ceiling is wet, if tiles have blown off or if a chimney or ridge has shifted, it is a job for a roofer and not something to leave until the weekend. A small stain that appears only in a heavy shower is less urgent, though still worth a look. A roof that is dripping into a room while it rains is the situation this page is about.
When you ring, a few details help. Say which part of the house the water is in, whether it is a ceiling, a wall or a window reveal, and how long it has been coming through. Say whether it is steady or intermittent and what the weather is doing. Describe the roof as best you can from below: pitched or flat, slate, clay, concrete or stone tiles, how many storeys, and whether there is scaffold already in place or a clear way to the back of the house. Mention any listed status, because a listed building changes what can be done. Send photographs if you can by WhatsApp on +44 7880 284133, which tells the roofer more than a spoken description.
Leaks and storm damage get priority with us. The sequence is to make the roof safe first and to plan the lasting repair second. We do not promise a time of arrival, because we cannot know what the weather and the day will do, and a firm that quotes you one before it has seen the sky is guessing. We will tell you openly what is possible and what the sequence will be. The office number is 01225 285181.
In your call, ask what the first visit will cover and what it will cost. A make-safe is a defined piece of work, and ask the roofer to spell out what it includes, whether it will be a fixed price and what the follow-up will involve.
What a make-safe visit involves
A make-safe has one aim: to stop the water and remove any danger, so that the proper repair can be planned in daylight. It is not the full repair, and a good roofer will say so. The first step on arrival is to look at the roof and the weather, and to decide whether it is safe to work at all. High wind, ice or lightning can mean the visit has to wait or be reduced.
Where it is safe, the typical steps are these. Loose or slipped tiles and slates are refixed or replaced with matching ones from stock. Gaps are covered, often with a tarpaulin or temporary sheeting fixed on timber battens so it cannot lift in the wind. A split in a valley or gutter lining may be covered with a temporary patch of lead or a membrane. Debris is cleared from the roof and the outlets so water can drain, and anything that threatens to fall is secured or removed. Where a chimney is loose, it may be made safe and its flashings protected until the rebuilding can be done.
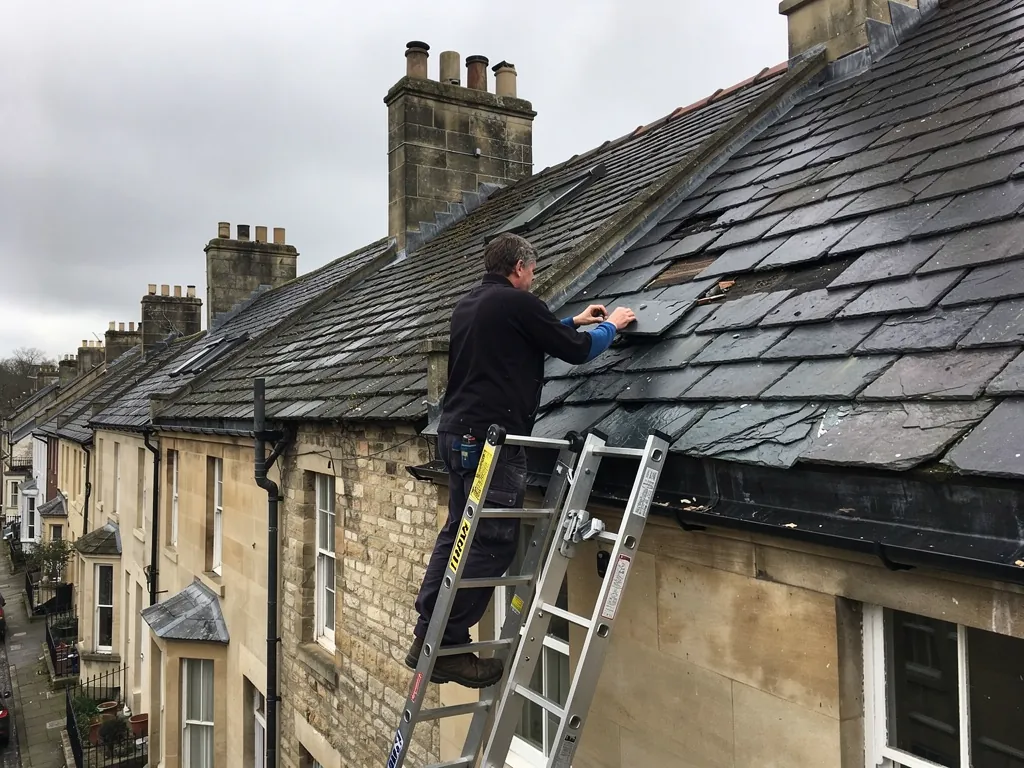
Access is part of the picture. A low roof can be reached by ladder, while a three-storey Bath terrace may need a tower or scaffold before anyone can work at the eaves or the parapet. Across the UK, MyBuilder's 2026 repair guide gives typical storm damage repairs as £500 to £1,500. Our own figure is set out on paper after we have visited. That figure varies widely with height and extent, so ask for a price for the make-safe on its own before the visit starts.
Afterwards, you should receive photographs of what was found, an explanation of what was done and a recommendation for the permanent repair, with a price in writing. Read about what a roof make-safe covers, how a tarpaulin is fixed and when a temporary repair is enough.
After the water stops
Once the roof has been made safe, the room needs attention. Keep the stain under observation: mark its edge in pencil and note the date, so you can tell whether it grows or dries. A stain that spreads after the roof has been secured means water is still getting in or is still moving through wet material. Plaster can take weeks to dry through, and timber longer. Use ventilation, not heat, and consider a dehumidifier. A musty smell or fresh mould on the ceiling after a few weeks is a sign that the moisture has not gone.
Do not redecorate until the area has dried and a roofer has confirmed the leak is fixed. Painting over a damp ceiling traps the moisture and the stain returns. If the plasterboard has been soaked, it often has to be cut out and replaced rather than dried, and any insulation that has been wet should be checked.
The permanent repair comes next. It might be as small as a handful of replacement tiles or as involved as relining a parapet gutter, and which it is comes down to the cause. The page on finding a roof leak explains how that cause is traced, and the guide to common roof repairs sets out the likely fixes. The signs a roof needs repair are worth knowing for the future, since many leaks give a warning weeks before the first drip.
Our visit to survey the roof costs nothing, and the photos we take are of your roof alone. A written, fixed price covers the repair, and the work is under a written ten-year guarantee. Other repair types are gathered under roof repairs in Bath.