
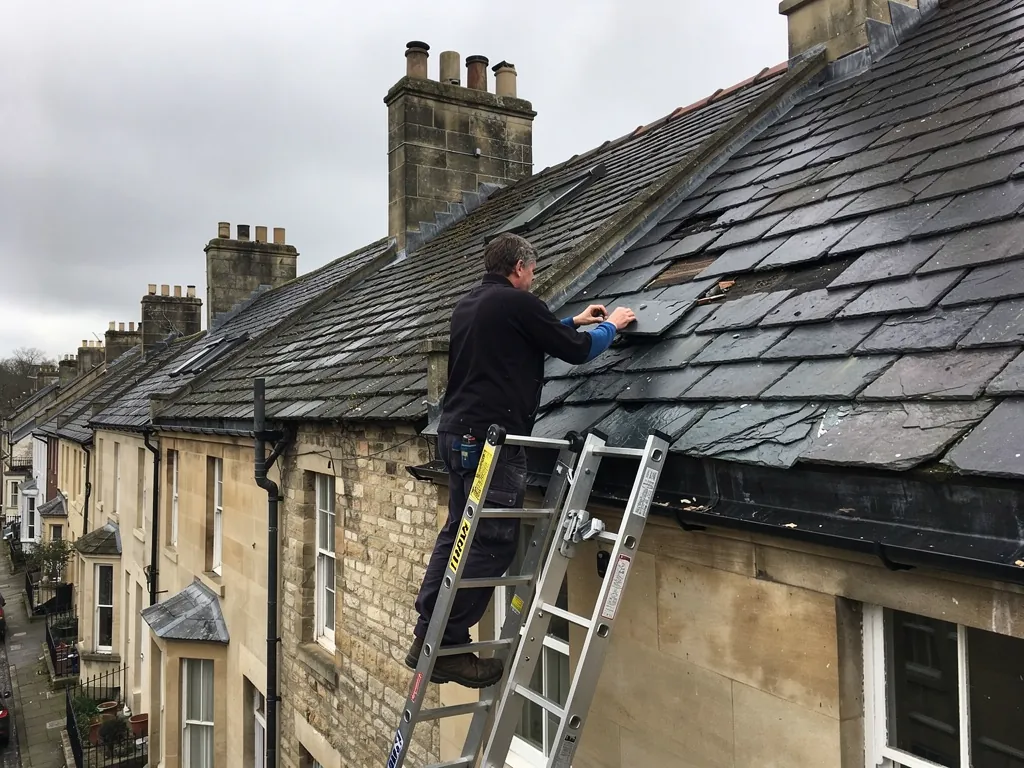
People expect a leak to sit directly above the stain, and when it does the repair is easy. More often the water has travelled a metre or two, sometimes much further, between the gap in the roof and the drip in the room. It slides down the underside of a tile, finds a rafter, follows the timber down the slope, crosses a purlin and drops at the first place where the plasterboard is thin or a joint is open. Finding the real entry point means working backwards through that route and ruling out the suspects one at a time. This guide describes how that is done: what the stain tells you, what the loft shows, which parts of a roof fail most readily, how water testing works and when instruments help. You can do the first stages from inside the house and from the garden. The later stages need access, a head for heights and the right kit, and they belong to a roofer.
Why the drip is rarely under the hole
Water obeys gravity, but it does not take the shortest route. On a pitched roof it enters through a gap in the covering and usually meets the underlay, the membrane that lies under the battens. From there it runs down the slope along the top of the felt, and it keeps going until it reaches a lap, a tear, a nail hole or the edge of the sheet. Then it drops onto a rafter or the top of the insulation. Timber carries water surprisingly well. A film of it can creep along the side of a rafter, over a joint and down a wall plate before it releases.
Capillary action adds to the confusion. Where two surfaces lie close together, such as a tile on a batten or a lead flashing against brick, water is pulled sideways into the gap instead of falling past it. Gusts drive rain upward beneath the overlaps in tiles and slates, along paths gravity alone would never take. A leak that only shows in a south-westerly gale is typical of this: the opening faces one way and the roof sheds water perfectly well in any other weather.
Flat roofs behave differently but with the same result. Water gets under the membrane at a split, travels along the deck or between the layers, and shows up at the lowest point or the first gap in the ceiling, which can lie well away from the fault. Our short page on how roof leaks travel sets out the typical routes.
The practical consequence is that you should not put a patch on the ceiling stain and expect the problem to stay fixed, and you should not accept a repair that is made directly above the drip without any explanation of why that spot. The first question for any leak is where the water entered. Where it appeared comes second, and it matters mainly as a clue.
Reading the stain and the weather
The stain itself carries evidence. A pale, damp circle with a soft edge is recent. A brown ring with a hard outline, or a series of rings one inside the other, means the area has been wet and dry many times, like the growth marks in a tree. A single stain that never changes size may be an old leak that has stopped, and one that grows after every shower is live. Pencil its outline and the date, and check again after the next rain.
Timing helps. A leak that starts within minutes of rain beginning suggests an open path, such as a missing tile or a split flashing. One that appears hours later, or only after several wet days, points to a slow route through insulation or masonry. A drip that continues after the rain has stopped is working through wet material, and that is a different problem from an active hole. If the leak appears only when the wind comes from one quarter, that tells you which face of the roof or which chimney side to suspect. Make a note of wind direction as well as the hour.
Position tells you which part of the building to examine first. A stain beside a chimney breast suggests the stack, its flashing or the pointing. A stain at the junction of a ceiling and an external wall suggests an eaves gutter, a parapet or an abutment. A patch in the centre of a room under a valley points to the valley lining. A mark under a roof window usually means the flashing or the seal around the frame. Condensation can imitate any of these, and the page on leak or condensation helps you rule it out before you pay for a repair. A page on the ceiling water stain shows what each type of mark means.
Searching the loft
If you have a loft and can reach it safely, it is the best vantage point you have. Bring a torch, put on old clothes and a dust mask, and keep your weight on the joists or on boards that you know are supported. Never step on the plasterboard between the joists. Start by turning the torch off and looking for daylight. Pinpoints of light coming through the roof show gaps. Then switch it back on and look for wet.
On the underside of the roof, look for dark streaks on the rafters, damp patches on the felt, droplets hanging from nails and sections of insulation that look flattened or discoloured. A line of drips on a rafter often shows the route the water has taken, and you can follow it uphill with the torch. The highest point where timber is wet is closer to the entry than the lowest. Press a finger or the tip of a screwdriver into the rafters near the wet patch. Timber that feels soft, or is dark and crumbly, has been wet for some time.
Check the chimney breast where it passes through the loft, the underside of any valley, and the lower ends of the rafters where they meet the wall. Look around soil and vent pipes where they pass through the roof. Look at the underside of roof windows, where condensation and genuine leaks are easy to confuse. Photograph what you see, with a coin or a tape in the frame for scale, because it helps anyone who comes to look later.
Not every house has an accessible loft, and some roofs have been converted so that the rafters are covered by insulation boards and plasterboard. In those cases the roofer works from outside, with careful lifting of the covering, and the interior clues carry more weight.
The suspects, in the order roofers check them
Roofs fail in predictable places, which is why an experienced eye can narrow a search quickly. Anywhere the roof meets something else is a suspect before the open slope.
Chimneys and abutments
The flashings around a chimney stack, a gable wall or a dormer are the first place to look. Lead lifts, splits or slips, and the pointing that holds it crumbles. The back gutter behind a chimney, the trough that collects water running down the slope above it, is a particular weak point and is hard to see from the ground.
Valleys and gutters
A valley lining carries water from two slopes and is hidden under the tiles at its edges. Splits in the lead, or a build-up of moss and leaves, may push water across the edge and beneath the covering. The same goes for parapet and box gutters on terraced houses, where a blocked outlet backs the water up over a lap.
Slipped or broken tiles and slates
A single displaced tile is a clear explanation, and our page on slipped tile repair describes the fix. The trouble is that a slipped tile is often a symptom of failing nails across the slope, which a roofer will check before deciding.
Ridge, hips and penetrations
Cracked bedding under a ridge, a loose hip tile, a gap at a verge, a soil pipe collar that has perished and a roof window frame that has shifted are all common. Rooflights and vent pipes sit in the middle of the slope and need their own flashings, and each one is a possible entry.
Gutters on the eaves matter more than they look. An overflow in heavy rain soaks the fascia and the top of the wall, and the stain that shows later in a bedroom corner is easily blamed on the roof. Clearing them is part of the check.
Flat roofs, parapets and rooflights
On a flat roof the search is slower, because there are no tiles to count and the covering looks continuous. Surface features give the first clues. Look for blisters in felt, splits at folds, lifted edges, pools of standing water and cracks in any hard coating. Check the upstands, the short vertical faces at the wall junction, and the flashings above them. Look at every pipe, vent, rooflight and cable that passes through the membrane, since each one is a joint in the waterproofing.
Water entering a flat roof tends to run along the deck or between layers before it comes out, so the drip is commonly well away from the opening. A leak at the centre of a ceiling might originate at the edge of the roof. Moisture in the insulation under a membrane can also give a false trail: wet material releases water slowly, so the ceiling may keep dripping long after the entry has been sealed.
Parapets add a layer of complexity. The coping stones, the pointing, the wall itself and the lead gutter behind it can each let water in, and water coming through stone can emerge on the inside of the wall some way down. On older Bath terraces the roof may drain to a lead-lined gutter behind a parapet, and a split at a drip in that lead leaves a long trail. Tracing these means opening the gutter, clearing it, and watching it fill and drain.
Where it is difficult to see what is happening, a roofer may use a moisture meter, which reads dampness through the surface, to map the extent of the wet area. For flat roofs in particular, thermal imaging shows wet insulation as a cooler region. MyBuilder's 2026 inspection guide reports typical UK prices that rise with the method: £150 to £250 for a standard visit, then more for drone or thermal work, up to £500. A fixed price for your own roof comes after our survey.
Testing with water, and the order of the test
When looking is not enough, the next step is a controlled water test. It is simple in principle: you wet one part of the roof at a time, starting low and working upward, while someone inside watches for the first sign of water. The order matters. If you start at the top, water runs over everything below it and you learn nothing. Begin at the lowest suspect, wet it for several minutes, and move up only when nothing has shown.
A garden hose with a gentle spray is usually used. For a chimney, the roofer wets the base first, then the flashing, then the stack, then the pointing, and waits between each. For a valley, the sequence runs from the bottom upwards. A second person waits in the loft holding a torch and a phone, and the two keep in touch. Each stage is timed and noted. A leak that needs ten minutes of wetting to show is a different thing from one that shows at once, and the delay tells you how long the route is.
The test is not a job for the homeowner on a ladder. It needs someone on the roof with a safe means of access, and it can make matters worse if water is driven into a structure that is already damaged. It is also not a good idea in freezing weather, in high wind or when the loft insulation is already saturated.
Where the leak only appears in wind-driven rain, a standard hose test can miss it, because the water has to arrive at the same angle as the weather. A roofer may spray upward under the laps to copy the conditions. Our page on roof leaks when it is windy goes through that case. If a hose test still reveals nothing, the roofer may lift tiles in the suspected area to inspect the underlay directly. Some leaks need more than one visit to find, and a professional says so instead of guessing.
From finding the leak to fixing it
Once the entry point is found, the repair follows from the cause. A slipped tile is refitted. A split in lead is repaired or replaced. A failed flashing is cut out and relaid into the masonry. A blocked outlet is cleared and, if the lining has failed, relined. What the roofer finds will also tell you whether the problem is one defect or the first sign of general wear. Several leaks in different places, or underlay that crumbles when lifted, usually points to a roof near the end of its repairable life.
You should expect the person who traced the leak to show you what they found. The survey photographs show your roof, so you can see the fault itself, what is proposed and the state of the roof around it. A fixed price goes in writing before work starts, and the workmanship is under a 10-year written guarantee. If a leak is active and the roof needs making safe first, our guide to an emergency roof leak covers the sequence.
Cost depends on what is wrong and how hard it is to reach. Our guide to roof repair costs sets out typical UK ranges for common repairs. For the full range of work we do on leaks and other faults, see the roof repairs service. If you are not sure whether to ring now or watch the stain, ring: a survey is free, and tracing the source early is cheaper than letting the timber behind it rot.
Phone 01225 285181, send a message on WhatsApp, or use the enquiry form, and include a photograph of the stain and the roof if you can.