
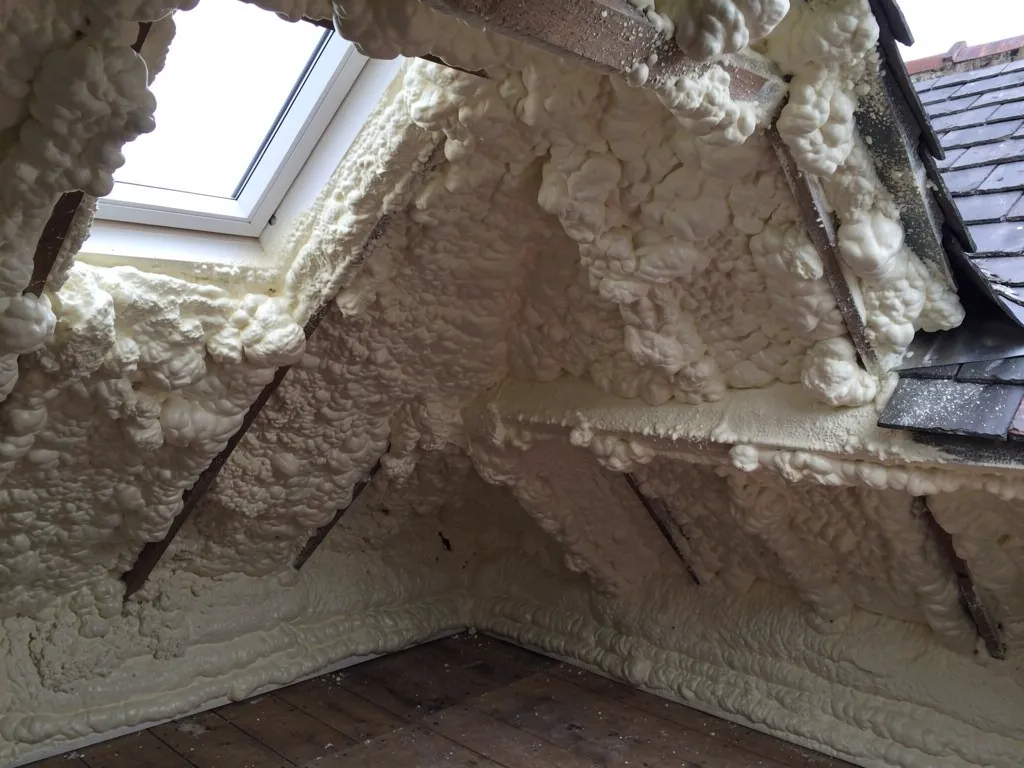
Taking spray foam out of a roof is only half the job. What you are left with is bare timber, a covering with no insulation behind it and a loft that will be cold the first winter if nothing is done. The second half is putting insulation back in a way that suits the roof, and doing it with air movement in mind, because the lack of it is often why the foam became a problem. There is no single right answer. A loft used for boxes calls for a different layout from a loft that is a bedroom, and a Bath terrace with a stone parapet behaves differently from a suburban semi. This guide walks through the choices: the cold roof against insulated rafters, the path air takes from eaves to ridge, what is done about underlay and battens, and where Building Regulations fit. It assumes the foam has been removed and the timbers have been checked.
Start with how the loft is used
The first decision is not about products. It is about whether anyone lives in the roof space. That one answer sets the whole layout.
If the loft is storage only, the simple route is a cold roof. The insulation goes at ceiling level, across the joists, so the heated rooms are wrapped below and the roof space above stays cold and ventilated. Air passes freely through, the timbers dry out after any wetting, and the roof behaves the way a traditional one does. This is often the lowest-risk outcome for a period house, and it avoids relying on a sealed layer of foam or boards doing its job perfectly for years.
If the loft is a habitable room, a study or a conversion, the insulation must run along the pitch instead. That makes a warm layout, where the insulation sits at rafter level and the roof space becomes part of the heated house. It is more demanding. It needs careful sealing against moist indoor air, and it needs a clear plan for any ventilation gap above the insulation.
Sometimes the answer is mixed. A house may have a conversion over part of the footprint and plain storage space over the rest. Then the roof is treated in zones, with a cold roof over the unused part and insulation along the slope over the room, and the junction between the two is detailed with care so no warm air escapes into the cold side.
We ask these questions at the survey because the answer changes the quote, the timber work and the regulations that apply. If you are not sure how you will use the space in five years, say so, and we will set out the layout that keeps the most options open.
A cold roof: insulation at ceiling level
For a loft that stays unused, insulating the floor of the roof space is the most straightforward path. Mineral wool rolls or similar insulation are laid between the ceiling joists, and a second layer is laid across them to cut heat loss through the timber. The material runs continuously, with no gaps at the edges or around pipes.
The detail that matters most is at the eaves. Insulation must not be pushed right down to the wall plate, because that would block the air entering through the soffit. A baffle or tray is set in at each rafter bay to keep a clear channel above the insulation, and the soffit vents are checked to make sure they open into the roof space rather than a lump of old foam.
Pipes and cold water tanks need thought. Now that the loft gets no rising warmth, anything up there is more exposed to frost, so tanks and pipes are lagged and the tank gets a lid. Recessed downlights, extractor fan ducts and flues through the ceiling are dealt with properly, so warm, damp air does not leak into the loft and condense on the cold side. The hatch is insulated and fitted with a seal.
If you want to use the loft for storage, boards are set on raised bearers clear of the insulation so the layer is not squashed. Compressed insulation does less.
This layout suits many houses and costs less than insulating the slope. It is also the route we favour for older roofs where the timbers have been through a wet period and need to dry, because it restores the airflow the roof was built to rely on.
Insulating along the rafters
Where the loft is a living space, the insulation goes in the slope. There are two common ways to build it, and both can be used together.
Between the rafters, insulation is cut to fit snugly. In a ventilated version, an air gap stays open above the insulation, beneath the underlay, so moisture that reaches the timbers can still escape. Insulation boards fixed across the underside of the rafters then reduce the heat that would otherwise pass through the timber, which acts as a thermal bridge. A vapour control layer, a membrane that holds back damp air from the rooms below, sits on the warm face and is taped at every joint. Plasterboard finishes it.
The gap above the insulation is not decoration. It is how the roof dries. Where the rafters are shallow, as they are in many older houses, fitting enough insulation in the depth is a trade-off, and a layer under the rafters is added to make up the thickness. That reduces the headroom, which is worth checking before you commit.
Where a warm roof is formed with rigid boards above the rafters instead, the boards carry the insulation, and the covering is lifted and refixed. That is more of a re-roofing exercise than a re-insulation, and it brings in the weight and regulation questions covered below.
We would not recommend insulating along the slope on a roof whose timbers have not been checked and treated, and we would not seal it without a clear plan for the vapour control layer. Taped joints and careful details around pipes, lights and hatches are what make a rafter-level system work for years rather than months.
Ventilation: getting the air moving again
In a cold roof, air has to keep moving through the space above the insulation, and a ventilated rafter layout needs a smaller version of the same path. Ventilation works with two openings, a low one at the eaves and a high one at or near the ridge, so air enters at the bottom and leaves at the top.
Marley's cold-roof guidance, which draws on BS 5250, gives typical openings, and they are not a design for your house. With a non-breathable underlay and insulation at ceiling level, the eaves opening runs the full length of the roof: 25 mm for pitches up to 15 degrees and 10 mm for steeper ones. A further 5 mm continuous opening at the top is added for pitches over 35 degrees, spans over 10 metres, and roofs that lean against a wall or slope one way only. A breathable underlay changes the sums. The figure then turns on how tightly the ceiling is sealed and how readily the covering passes air, and one worked example, a well-sealed ceiling, gives 3 mm at the eaves where third-party certification backs it. Check the manufacturer's guidance and the standard for your own exposure.
In practice we restore the path by clearing the eaves, fitting soffit vents or over-fascia vents where there are none, adding tile or slate vents near the ridge and setting rafter trays at the foot of each bay. On a stone-walled house with a parapet, the ventilation is planned so it does not rely on the parapet gutter.
The key is to confirm the air actually moves. We look from outside for the vent and from inside for a clear route behind it, and we do not treat a vent in the soffit as proof of a path. A grille over a blocked void does nothing.
Underlay, battens and the covering
With the foam gone, the layers under the slates or tiles can finally be seen. The underlay is the waterproof sheet draped across the rafters, and the battens are the timber laths fixed across it that carry the covering. After foam, both often need attention.
Foam leaves residue. On the back of slates, on the battens and on the underlay there may be patches that were too stuck to lift. Removal can also tear an old felt underlay or leave it brittle. Where the underlay is damaged, it is replaced, and a modern breathable membrane is often the choice because it lets moisture vapour pass out while keeping rain from the roof space. Battens that are soft, split or rusted at the fixings are renewed. Sound ones are cleaned and kept.
That sounds like a small matter, but it can turn a repair into a re-roof. To renew underlay and battens across a slope, the covering must come off and go back on. For slate, that means careful sorting and new fixings where the old nails have rusted, and for natural slate it is worth matching the replacement to the original rather than swapping materials.
Scale decides whether approval is needed. The Planning Portal guidance on re-roofing treats re-covering as normally exempt while the job is small relative to both the whole building and the roof itself, with the exact limits set out on that page. Past those limits building control approval applies and a thermal upgrade may be required. A covering heavier by 15 per cent or more needs approval too.
Where approval applies, we handle the application, either with the council's own inspectors or with a private approver on the register, as you prefer.
Regulations, sequence and cost
Insulation is judged against the thermal standard set by Approved Document L. Approved Document L gives 0.15 W/m²K for roofs in its Table 4.2, and new work should do no worse than the part it replaces. Whether your particular job counts, and how, is for your building control body to confirm, so ask them before the work starts.
The order of work matters. First the foam is removed and disposed of. Then the timbers are checked and treated or repaired. Next, if the roof needs it, the underlay and battens are renewed. Ventilation is restored. Only then is the insulation fitted, with the vapour control layer if it is a rafter-level system, and the ceiling is finished. Leave any step out and a later one is compromised. Insulation fitted over damp timber, for example, traps the water you were trying to cure.
On cost, typical UK figures from the MyBuilder spray foam removal cost guide (2026) give removal at £20 to £50 per m², averaging about £1,500, with disposal at £150 to £400. The guide names the insulation and membrane chosen to replace it as one of the factors that moves the total, along with loft area, foam type and timber condition. Our written, fixed quote follows the survey, with removal, repairs and re-insulation itemised so you can see each part.
Once the roof is insulated again, keep the paperwork: the foam removal record, the timber report, the insulation specification and any building control certificate. It becomes the file you hand over when you sell. The seller's side is covered in selling with foam in the roof, which shows how buyers read it, and our page on how long spray foam lasts sets the choice in context. The RICS March 2023 guidance is covered in our plain-terms guide, and the whole service is described on the spray foam insulation hub.