
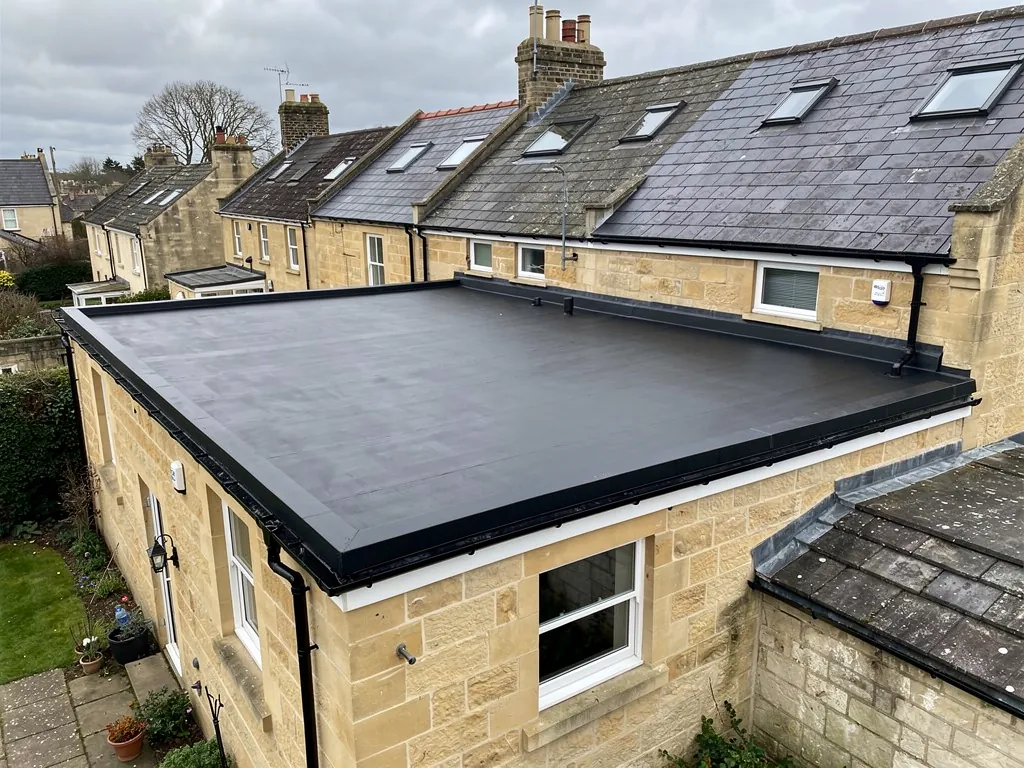
EPDM is a synthetic rubber, short for ethylene propylene diene monomer, and it has become one of the most common coverings for domestic flat roofs. It arrives on site as a large sheet, which is cut to suit the roof and glued down, so that on a typical garage, porch or extension the waterproof surface is a single piece with no joints across it. That is its main strength, because most flat roof leaks begin at a joint. The flip side is that the result depends heavily on the preparation beneath the sheet and on the details at the edges, which are formed by hand. This guide follows the process in the order it happens on site, from the deck to the trims, then looks at what really determines how long an EPDM roof lasts. Prices quoted here are national typical ranges. A fixed price is set only after we have surveyed your own roof.
What EPDM is and where it suits
EPDM is a flexible black rubber, made in rolls and cut to fit each roof. It is stretchy, so it moves with a roof that expands and contracts, and it does not need heat to install, which removes the naked flame that felt systems often rely on. Wide sheets mean a small roof gets one piece of rubber and a larger one needs only a few.
It suits simple shapes. A rectangular extension roof, a garage, a porch or a dormer top, with a few outlets and perhaps one rooflight, is the natural home for EPDM. Awkward roofs, with curves, many steps and numerous penetrations, take more time to detail in rubber, and some owners prefer a resin system such as fibreglass for them. We set out the comparison in our guide to GRP fibreglass roofs.
On cost, MyBuilder's flat roof pricing (2026) gives £90 to £130 a square metre installed as the typical UK range for EPDM, a band between felt and GRP. That rate covers the membrane and its fixing. It does not include scaffold, a new deck, insulation or disposal, and a roof that needs those can cost a good deal more overall. Your fixed quote follows the survey.
One further point is appearance. EPDM is matt black and shows little pattern, which looks tidy from a window above. It is less in keeping on roofs that are visible from the street in an older neighbourhood, where metal or another finish may suit better, and we raise that at the survey.
Preparing the deck: where most of the quality is decided
Rubber copies whatever lies beneath it. A rough board, a protruding nail head or a damp patch will all show through, and any one of them can shorten the life of the sheet. For that reason the first stage of the job is the preparation of the roof, and it takes as long as the laying.
The old covering is stripped back, and the deck is inspected. Soft or stained boards are cut out and replaced, and joist ends are checked where they can be reached. Sheets of plywood or similar board are fixed down flat, with their edges supported and their screw heads set below the surface. The surface is then swept and cleaned, because dust and grit weaken the adhesive.
If the roof is being insulated, rigid insulation boards go on at this stage, over a vapour control layer, with the rubber to be stuck on top. A firm, flat insulation face matters, since a soft or uneven one leaves the sheet unsupported. This build-up, known as a warm deck, is explained on where insulation sits in a flat roof.
The roof must also fall towards the outlet or gutter. Where the existing deck is dead level, tapered timber strips called firrings, or tapered insulation boards, are added to create a slope. Without a fall, water stands on the rubber, and standing water ages every seam and detail around it. We found no UK EPDM maker's fall figure, so the reference is BS 6229:2018: IKO gives the recommended minimum fall as 1:80, with the roof designed to 1:40 to allow for construction tolerances, deck deviation and deflection.
Conditions matter as well. The adhesive needs a dry, clean surface, and the sheet needs to be laid in suitable weather, so a roof should not be started if rain is on the way.
How the sheet is laid and adhered
The sheet is rolled out loose across the roof and left for a short while to relax. It is cut generously so it laps over the edges and up the walls. Cutting it large at this stage is deliberate, because the rubber will be trimmed to its final shape after it is stuck.
Bonding follows a steady routine. One half of the sheet is folded back over the other. Bonding adhesive is brushed or rolled on to the exposed deck and on to the underside of the sheet, then both are left until the glue is tacky enough to grip but no longer wet. The sheet is then rolled back on to the deck gradually, and swept from the centre outwards with a soft broom to push out air, so that no pockets are trapped. The second half is treated in the same way.
At a wall, the sheet runs up the brickwork to form an upstand, an upturned edge that stops water from running behind the covering. Corners are folded or fitted with a pre-formed piece so that the rubber is not cut through, because a cut corner creates a weak spot. Any joins between sheets, which are unavoidable on a larger roof, are made with a specialist tape or seam adhesive, and need a clean, dry surface to hold.
Some larger roofs use a different method, with the sheet laid loose and held down with ballast, or fixed mechanically along the edges. They suit big commercial roofs better than a domestic extension, where full bonding gives a smooth, secure finish.
Once the glue has cured, the work moves on to the edges, where the detail begins.
Trims, upstands and details
The sheet itself is only the field of the roof. Water gets in at the edges, so the finish at each boundary decides whether the roof stays dry.
Edge trims
At the eaves, the rubber is carried over a drip trim, an aluminium or plastic profile that throws water clear into the gutter. At a gable edge, a similar trim holds the sheet and keeps rain from running back under it. The trim is secured to the deck, with the rubber adhered to it, not simply laid over it.
Wall junctions
At a wall junction, the upstand is sealed along its top edge. In brick or stone, that usually means a metal flashing, a strip let into a groove in the masonry and dressed down over the rubber, or a termination bar fixed with sealant. On a rendered wall the rubber may be tucked beneath the render or sealed with a cover trim. These details need to rise above the finished surface by a safe margin, a point that matters more when the insulation thickness is increased.
Outlets, pipes and rooflights
A rainwater outlet is fitted with a moulded part that the sheet is adhered to, which gives a watertight seal around the opening. Pipes pass through with a preformed collar, and a rooflight sits on a kerb that the rubber covers and seals at the top. Each is a hand-formed joint, so the work takes time, and each is checked on completion.
Threshold details
Where a door opens on to the roof, the rubber must stop below the threshold with a drained detail, as we explain on the page about Building Regulations for flat roofs, since a higher roof build can interfere with the step.
How long an EPDM roof lasts in practice
Published figures for EPDM disagree. GreenSpec gives 20 to 30 years, the Building Centre in excess of 25 years, and the cost guide Less 30 to 50 years, adding that manufacturer warranties of 20 to 25 years are standard. The fair summary is a typical life of 20 to 30 years or more, depending on exposure, workmanship and maintenance, and it is never a promise. A warranty is not a lifespan either. In practice, an EPDM roof ends its life in one of a few predictable ways.
- Details fail before the sheet does. Sealants harden, adhesive at an upstand lets go, a trim lifts and a seam opens. These are the usual first signs of age and are normally repairable.
- Punctures. Rubber is tough but not proof against a sharp edge. A dropped tool, a fallen branch or a heavy boot on grit can cut it.
- Standing water. A roof without enough fall holds water in a dip, which stresses the seams and any joint nearby.
- Poor preparation. A sheet laid over damp boards or an unclean deck can blister or lift in places.
- Neglect. Leaves and moss that block an outlet cause ponding, and moss roots at the edges can lift a trim.
Most of those are avoidable. A deck that is dry and flat at the start, a sound fall and well-fixed trims make a sheet that is free to do the job it was made for. Clearing the outlets and gutters once or twice a year, and keeping foot traffic to a minimum, helps a great deal.
Beyond the published figures, we can say that the specification of the deck, insulation and details is written into the price, that we show you the stripped roof in photographs before it is covered, and that a dry spell of a few days is the best window for laying, since the adhesive needs a dry deck to bond. All the coverings are set side by side in our note on flat roof lifespan.
Repairs, damage and insurance
Small damage to an EPDM roof is easy to deal with when it is caught early. A puncture or a short tear is cleaned, primed and covered with a patch of self-adhesive rubber, lapped well beyond the damage and pressed down with a roller. A lifted trim is refixed and sealed. A failed corner can be reformed. All of these suit a roof whose deck and insulation are still dry, and a dry roof is what we check first.
A repair has limits. If water has entered and soaked the insulation or boards, patching the rubber on top cures the symptom and leaves the damp below. If the roof has been patched many times, or the sheet has stiffened, shrunk back from the edges or developed splits across its field, a new covering is usually the better use of money. We say which it is, and show our reasons, at the survey.
Storm damage and accidental damage raise a separate question. Insurers commonly distinguish between damage caused by an event and damage caused by wear, and they may ask for dated photographs and a roofer's report. Keep what you have from the installation, because it shows what the roof looked like when it was built. Our guide to flat roof insurance covers that side.
On a listed building, or on a flat roof forming part of a listed house, listed building consent may be needed from B&NES Council for a new covering, and the finish can be part of that discussion. For any roof, the starting point is a visit. We examine the deck, the falls and each edge, photograph the roof, and write up a fixed price for your flat roof.