
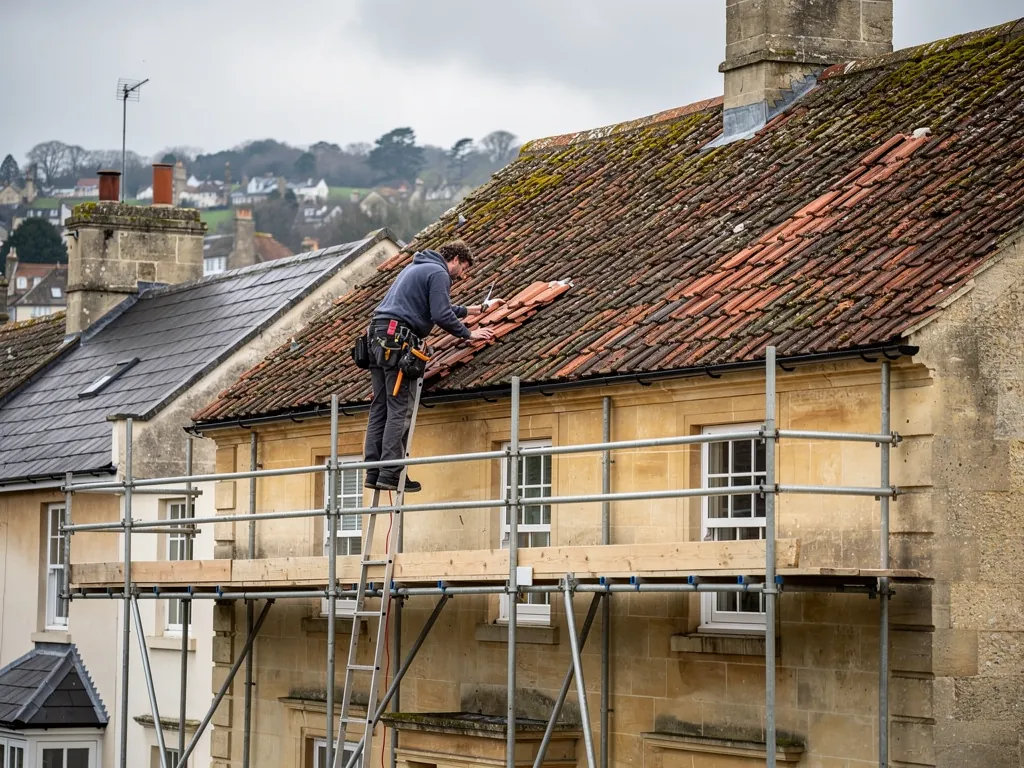
When a tiled roof starts to leak, the tile that looks wrong is seldom the whole story. Underneath it sits a set of ageing parts: the underlay, the battens, the nails or nibs holding each tile, and the rafters carrying the lot. In a house that has stood for a hundred years or more, those parts have been working through every winter, and they wear out at different rates. A tile may be perfectly good while the nail through it has rusted away. A rafter may look straight from the loft hatch while its feet have been creeping outwards for years. This guide takes the typical system faults one at a time, describes the clues visible from the pavement and from a loft hatch, and sets out the repair that fits each. Owners of older tiled houses near Bath will find it useful when reading a surveyor's report, or when checking that a quote is aimed at the real cause.
Why older roofs fail from the inside out
A roof covering is the part everyone looks at, but the parts that fail first are usually the ones out of sight. Tiles are made to last. The things holding them, and the things catching the water that gets past them, are made from timber, bitumen-soaked paper and iron, and those wear out sooner.
That has a practical consequence. A leak at one spot in the ceiling can come from a perished sheet of underlay two metres uphill, because water that gets past a tile runs along the underlay until it finds a tear. Replacing the single tile above the stain does nothing for it. Reading the symptoms properly means working back from where the water shows to where it entered.
The typical symptoms of a system fault are these.
- Tiles that have slid down and left a gap, with the tile itself intact.
- Damp patches in the loft along the line of a rafter or batten, rather than under one tile.
- Daylight visible between the tiles from inside, which tells you the covering has opened up.
- A ridge line that sags or a slope that bows outwards, which points to the frame rather than the covering.
- Dust or fragments of dried felt on the loft insulation.
None of these is cause for alarm by itself. They are reasons to have the roof looked at from both sides. Our guide to how a pitched roof is built explains the layers if you want to see how they stack up before reading about their failures.
Perished underlay
Older tiled roofs often have a bitumen felt under the battens. Underlay is the layer that intercepts water driven in beneath the tiles and leads it to the eaves. Bitumen felt dries and hardens with age, and a sheet that was flexible when laid becomes brittle. It cracks where it is stretched over the rafters, splits at the laps, and tears around the nails.
You can often see the effect from inside the loft. Shine a lamp along the roof slope from inside. Felt that is intact is a continuous dark sheet. Perished felt is flaky, hangs in strips or has gone altogether in patches, and the timbers behind it may be stained with old runs of water. Dry, crumbling pieces on the insulation below are another giveaway.
The effect is quiet at first. In ordinary rain the tiles do most of the work and the loft stays dry. In a gale with rain driven sideways, water gets under the laps, finds the broken underlay and drips into the loft. People often report a leak that appears only in certain wind directions, which is exactly what this fault does.
The repair depends on the extent. Patching a torn area with a new strip lapped under the tiles above works for a small, local failure. When the felt has aged right across the roof, the sound fix is to strip the tiles, lay new underlay, re-batten if needed and re-fix the tiles. This is the job usually called re-felting, and the cost and timing are covered in our answers on how long roof felt lasts and re-felting cost.
Before new underlay goes on, the loft ventilation should be checked as well, because a modern breathable sheet and a blocked eaves gap do not work well together.
Nail and nib failure: the slipping tile
Of all the faults on an old tiled roof, this is the one most owners notice first. A tile has slipped, sits crooked, or has dropped into the gutter. It can look like storm damage. Very often it is not.
Plain clay tiles are hooked over the batten using two small lugs moulded on the back, known as nibs. The nibs are a weak point, because they are thin and take the full load of the tile. Over years of frost, vibration and wind lift, nibs crack. Once they are gone, the tile is held only by its neighbours and by a nail, if there is one, and it starts to creep. Other tiles are fixed with nails alone, usually iron or steel in an older roof. Those corrode, and a rusty nail loses its grip on the batten and eventually shears, leaving the tile loose.
The pattern gives it away. A single slipped tile after a storm is likely to be a one-off. Several tiles sliding in the same area, on a slope that has not been disturbed, points to a general failure of nibs or nails, and it will continue. Our answer on why roof tiles slip deals with the cause in a bit more detail.
The repair for a few failed tiles is to lift the course above, remove the broken tile and fit a replacement, secured with a corrosion-resistant clip or nail. Copper, aluminium and stainless steel are the usual choices because they do not rust. Where the fixings have gone right across a slope, spot repairs stop paying their way. Each visit fixes a few tiles while the rest are failing at the same rate, so the sensible option is to take the covering off, re-batten as necessary and re-fix the tiles with modern clips.
A tile profile that is out of production is matched with a reclaimed one taken from a similar roof. Profiles and materials are set side by side in the roof tile types comparison.
Rotten and split battens
Battens are the timber laths that the tiles hang from, and they are exposed to every drip that gets past the covering and the underlay. In an old roof they have usually been there for as long as the house, and the timber was not always treated.
There are three typical problems. The first is rot, which sets in where a leak has soaked the timber repeatedly. It concentrates near valleys, chimneys, the eaves and under cracked tiles. The second is splitting along the grain, usually where nails have gone through and the timber has dried. The third is the wrong size: some older roofs were battened with narrow or thin timber that sags between rafters under the weight of the tiles.
Sound battens ring when you tap them and resist a screwdriver. Rotten ones are soft and crumble, and they let nails pull out. A roofer can often tell from the underside, but a few tiles must be lifted to look at the top, which is why a full diagnosis involves taking a section apart.
The repair depends on how much is affected. Single battens can be cut out and replaced with a new length of treated timber, fixed to the same rafters, if the adjoining battens are sound. If many are affected, the whole slope needs re-battening. That is usually done at the same time as renewing the underlay, since both sit beneath the tiles and the tiles have to come off to reach either. The roof batten sizes and gauges are covered in our guide to roof battens.
One caution is that a rotten batten may point to a source of water that is still active. Fixing the timber and leaving the cause will repeat the problem, so the repair must include finding the leak.
Spreading rafters, sagging slopes and weak frames
Some problems sit in the structure rather than the covering. They are rarer than slipped tiles, and more serious.
Spreading rafters
A pair of rafters meeting at the ridge pushes outwards at the foot as well as downwards, and it is held in place by the ceiling joists or by a tie across the roof. If that tie has been cut, rots, or loses its fixing, the rafter feet slowly spread. The outside wall at eaves level may lean or crack, and the ridge may drop. Over years the roof loses its line.
Sagging between supports
A long rafter without a purlin, or a purlin with too little support, sags under the covering. From outside this appears as a dip or belly in the slope between two level points. Heavier replacement tiles in the past can make it worse. Our short answer on a sagging roof goes through what to check.
Decayed timber at the wall plate
The wall plate sits on the top of the wall at the eaves, often where the gutter has leaked into the masonry for years. The ends of rafters and the plate itself can rot where they are in contact with damp brick or stone.
These faults call for a structural look, and sometimes for an engineer. The repair may be as small as a new tie or a sistered timber alongside a decayed rafter end, or as large as rebuilding a section of frame. A cracked wall or a visibly bowed ridge should be looked at before any new covering goes on, because tiles laid over a moving frame will not stay put.
Roosting bats and active bird nests have legal protection, so a timber repair that disturbs either has to pause while advice is taken.
Choosing between repair and re-covering
The sensible question is not whether a fault can be repaired. Almost anything can. It is whether repair deals with the cause or only with the symptom. A useful test is to ask whether the fault is local or general.
Local faults, such as a few failed nibs, a single torn patch of underlay or one rotten batten beside a leaking valley, suit repair. The fix is cheap relative to a re-roof and does not need much disturbance.
General faults, where underlay has perished across a slope or nails are failing everywhere, are different. The materials have reached the end of their service across the roof, and fixing them one at a time means repeat visits. The 2026 MyBuilder repair guide reports national figures, and the steps between them are wide. A leak or a handful of tiles falls in the £100 to £300 band. Moderate work spans £500 to £1,000, while the major end begins near £2,500. Set those beside the cost of several moderate visits over a few winters and the case for re-covering is easier to weigh. Only a survey of your own roof turns that into a fixed price.
There is also a regulatory point. On the Planning Portal's test, repairs or re-covering affecting less than 25 per cent of the total building envelope and less than 50 per cent of the roof do not normally need building control approval. Re-covering the whole roof takes in more than half of it, so approval is normally needed, and you may be required to upgrade the roof as a thermal element. The Planning Portal sets out the rules on its re-roofing page, and we take on the building control paperwork when the job requires it.
A listed house has a stricter rule: changes to the covering need consent from B&NES Council, repairs that alter the material or look included. A separate guide on mansard roofs covers a roof form with its own set of failure points.
What a survey looks at and what you receive
A survey on a roof like this has two halves. From outside, we look at the whole covering for slipped, cracked and missing tiles, a dipping ridge, a bellying slope and flashings or valleys that have lifted. From inside, we climb through the hatch and study the underside: the underlay, the battens, the rafters, the wall plate, the ceiling ties and any damp or daylight.
We then lift a few tiles at representative places, because the top of a batten and the condition of the nails cannot be judged from below. Photographs of the actual roof go into the report, which means you see the same defects we do.
A fixed price in writing comes next, itemised: the repairs, the parts renewed, the tile specified and whether building control is involved. Where a repair is enough, the quote is for the repair. At handover the site is clear and the waste has gone, and you get photographs of the repaired areas to keep with the house records for any future sale.
If you suspect your roof has one of these faults, the starting point is our pitched roofing service. Active leaks and storm damage are prioritised. A roof admitting water is first made safe by a temporary fix, and the lasting repair is planned afterwards.