
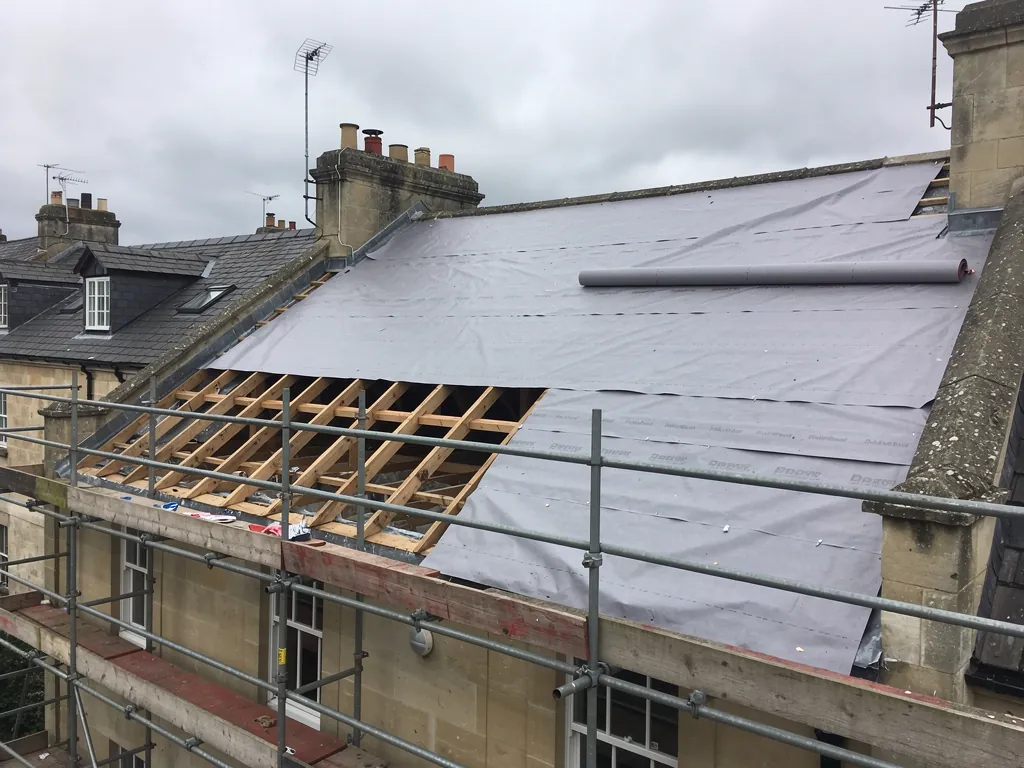
A re-roof looks simple from the pavement: old covering comes off, new covering goes on. In practice it is a sequence of stages, and each one depends on the one before it. The scaffold has to be right before anyone strips a slope. The timbers have to be sound before the underlay goes down. The underlay and battens have to be set out correctly before a single slate or tile is fixed. Skip or rush a stage and the fault stays hidden under the new covering for years. This guide walks through the stages in the order they happen on a pitched roof, explains the terms as they come up, and says where the paperwork fits in. It is written for a house in or around Bath, where older roofs often carry lead details, stone or slate coverings and a few surprises in the timbers. The details change from roof to roof, but the order does not change much.
Stage one: the survey and the written scope
Nothing starts until someone has been on the roof and inside the loft. A proper survey looks at the covering from above, then at the underside from the loft: the rafters (the angled timbers carrying the roof's weight down to the walls), the purlins and wall plates, the back of the boards or felt, any daylight where there should be none, and stains that show where water has run. It also looks at what is attached to the roof: the chimney stacks, the valleys, the abutments, where a slope finishes against a wall, the parapet and box gutters on a terrace.
Think of a box gutter as a leaded trough tucked between two pitches or behind a parapet wall, draining a lot of rain through very little width. A valley is the inward corner formed where two pitches join. Both are usually hidden from the street and both tend to fail before the main slope does, so they are written into the scope rather than left as an extra.
The survey is also where the choice between repair and replacement gets tested. Where a repair would work, a repair is what should be recommended. When replacement is right, the scope sets out what is coming off, what is staying, which covering is going back, and what happens to the lead and the chimney work. Our survey comes with pictures taken on your roof, so the faults we describe are ones you have seen too, and a written fixed price follows. The scope should read like a list you can check at the end of the job, not like a headline figure.
If you are weighing up different coverings, our guide to re-roofing materials covers the choices before you commit to a specification.
Stage two: permission, notices and scaffold
Paperwork gets settled before any scaffolding arrives. Most re-roofs need a decision on Building Regulations, and many older Bath houses need a conversation with B&NES Council about consent, whether for a listing or a conservation area. Those routes are covered in detail in our guides on Building Regulations for re-roofing and planning and consent for a re-roof, so here it is enough to say that the answer shapes the job. It decides whether a building control body inspects the work, whether the roof needs a thermal upgrade, and whether the covering has to match what is there.
Scaffold comes next, and it is more than a safety measure. A full scaffold with a working platform at eaves level lets the roofers carry materials up and old covering down without ladders, and it holds the debris chutes and the edge protection. On a terrace it may need to span a basement area or cross a shared boundary, which is why access gets looked at during the survey and not on the morning.
Scaffold is one of the larger separate costs. Typical UK figures from MyBuilder's 2026 guide to new roof costs are about £1,125 for scaffolding and £100 to £1,000 for taking waste away. Neither is an Empire price. What you actually pay is settled in the written quote. If the scaffold is going to stand for a while, ask who is responsible for it, and whether the tarpaulins and sheeting for rain are included in the price.
Neighbours should hear about the work before the scaffold goes up. A short note covering the start date, the noise and the access arrangements avoids most of the awkward conversations later.
Stage three: stripping the old covering
Stripping is the noisy stage and the one that exposes the roof's real condition. Crews work section by section, which keeps the house from standing open to the sky. A slope is stripped, the timbers are checked and covered, and only then does the crew move to the next. Rain protection, whether sheeting or a membrane, is rigged before each section comes off, because a dry forecast does not always hold. Our page on what happens if it rains during a re-roof goes through how that works.
What happens to the old material depends on what it is. Natural slate, stone tiles and clay tiles are sorted. Anything sound and matching can go back on the roof or be kept for later repairs, and anything cracked, soft or flaking goes. Concrete tiles are rarely reused. Lead is taken off, inspected, and either replaced or, where it is in good order and the detail suits it, dressed back. Old nails, battens and felt go to the skip.
Some older roofs bring in a material that needs separate handling. Asbestos cement sheets and slates were used on some buildings, and if one turns up, work stops until it has been identified. Asbestos cement lifted gently and kept whole falls under non-licensed work in HSE guidance; smashing it up would make the job notifiable. Work halts, and you hear from us, before anything else happens.
It is also the point at which bats or nesting birds may be found. Both are protected, so if signs turn up the work pauses and the right advice is taken before it carries on.
By the end of the day, the site should be tidy, with debris in the skip and not on the lawn.
Stage four: timbers and the structure under the covering
With the covering off, the roof structure can be seen properly for the first time, and this is where the quote and the reality sometimes part company. Rafters get checked for rot, insect attack and sagging. Wall plates, the timbers that sit along the top of the wall and take the rafter feet, are checked where they meet damp masonry. Valley boards, the timbers beneath the lead, and the boards behind a parapet gutter are the most likely to have suffered, because water leaks there for a long time before it shows inside.
Repairs here usually mean cropping out the decayed length and fixing a new timber alongside the sound one, a process called sistering. Where a rafter foot has rotted, a new end is spliced in. A sagging ridge may call for a structural check before it is touched. The aim is a sound, level frame, because new battens and a new covering will follow every dip and bulge underneath.
This is where a fixed price meets a variable. A good scope sets out an allowance for timber repair, or a rate for extra timber, and promises pictures of anything beyond it. You should not be asked to approve work without seeing the problem. For the fuller picture of when timbers are renewed and how it is priced, see our guide to replacing roof timbers during a re-roof.
If the new covering is heavier than the old, this stage matters more. A new covering fifteen per cent heavier, or more, triggers Building Regulations approval, plus a look at the structure. Swapping lightweight material for heavy stone or clay can mean strengthening what is below it.
Stage five: underlay, battens and ventilation
Underlay is the sheet that goes down first over the rafters, ahead of the battens. It catches whatever gets past the covering, such as spindrift from a gale or condensation, and pass it to the gutter. Modern breathable membranes let moisture vapour from the house escape through the roof, which helps older lofts stay dry. The laps, the eaves detail and the way the membrane is dressed into the gutter all matter. A membrane that finishes short of the gutter lets water creep behind the fascia and reach the wall.
Battens are slim timbers nailed across the rafters; each slate or tile is hooked or nailed to one. The covering and its lap decide the gauge between them, so they are marked out from the eaves and checked against the ridge before fixing. Counter battens, laid up and down the rafters, are used on some roofs to create an air path under the membrane. Our guide to materials covers why the choice of covering drives the choice of timber and spacing.
Ventilation is built in at this stage too. A pitched roof needs air to move through the loft space so that moist air from the house does not condense on cold timber. That means eaves ventilation, and vents at the ridge or high on the slope if the design needs them. The work also has to fit with any insulation going in, which is why this stage of a re-roof often involves a conversation about the energy side. Our guide to making a roof more energy efficient when you re-roof goes through those options.
None of this is visible when the job is finished, and all of it decides how the roof performs.
Stages six and seven: the covering, the details and sign-off
Now the visible part begins. Slates or tiles are laid from the eaves upward, each course lapping the one below. Stone tiles and natural slate on older houses are often laid in diminishing courses, with larger units at the eaves and smaller towards the ridge, and that detail is kept so the new roof looks like the old one. The verge (where the slope ends at a gable), the hips and the ridge come next. Under BS 5534:2014, bedding mortar cannot be relied on by itself for a ridge, hip or verge piece, and each gets a mechanical fixing.
Then come the details that keep water out. A flashing is lead dressed over the seam where a roof slope butts a chimney or a wall. Soakers are small lead sheets slipped beneath the courses beside that seam, steering water back out onto the slope. The chimney is the one that gets most attention, because the stack often needs repointing or its flaunching, the mortar cap around the pots, renewed. Our guide to chimney work during a re-roof covers that. The valley and parapet gutter linings are laid or renewed at this point, and gutters and downpipes are checked or replaced.
Sign-off is the last stage and the one people forget to plan. The roof is walked and inspected, the site is cleared and every bit of waste goes off in the skip, and where the work needed Building Regulations approval, the building control body inspects and issues a certificate. Our page on the re-roof completion certificate explains what to expect. Keep the certificate with the invoice, the tile or slate specification and photographs of the old and new roof, since that is the paperwork you may want when you sell the house or make an insurance claim. Read more on the insurance side of a re-roof, and see our wider roof replacement service.